在本教程中,您将看到如何开始可视化并创建逼真的3D经典车。 在接下来的几个问题中,我们将从第一个阻塞阶段到最终渲染的汽车建模过程。在这些教程中,我们将使用Maya来建模汽车,V-Ray的可视化和Photoshop来编辑图像。 尽管如此,您使用的软件实际上并不重要,因为重点将放在创建模型背后的原则上。
AutoDesk maya 2015 64位中文版(附序列号和密钥)
查看详情
我们将创建1939年的Delage D8 120 CabrioletChapron,但使用本教程作为基础,您将能够创建任何车辆。 我们也将使用多边形。 我们将从一个简单的框中创建几何,并且会反复平滑,直到我们获得所需的细节水平,最终得到高度详细的模型。
In this tutorial, you will discover how tobegin to visualize and create a photorealistic 3D classic car. Over the nextfew issues, we will follow the process of modeling a car from its firstblocking stages, to the final render.During these tutorials we will use Maya forthe modeling of the car, V-Ray for its visualization and Photoshop to edit theimage. Despite this, it actually doesn't matter what software you use, as theemphasis will be on the principles behind the creation of a model.
We will create the 1939 Delage D8 120Cabriolet Chapron - but using this tutorial as a base, you will be able tocreate any vehicle. We will also work with polygons. We will create geometryfrom a simple box, and will smooth it repeatedly until we obtain the desiredlevel of detail, ultimately ending up with a highly detailed model.

Step :01 References
First, we need a photo of the car. Shots onall sides of the vehicle are obligatory, so first let's examine the properselection of references:
1. It is preferable that you have a photoof the car on all sides. We need to see the car's shape with all the details.If you don't have enough photos or you don't have a large shot with particulardetails, you need to take a pencil and draw these details in to understand theshapes.
2. It is good to know the car's sizes too:its length, width, height and wheelbase. We need it to better observe andrecreate the proportions.
3. A blueprint is not all that necessaryfor the creation of the car. Very often they are incorrect, though they canhelp during those first stages in the creation of the model, when we need tobuild the main shape quickly and correctly. If you don't have a blueprint, it'snot a problem, as photos and the car's sizes will be enough.
一、参考文献
首先,我们需要一张汽车的照片。 首先要检查车辆的各个方面,以便正确选择参考文献:
你最好有车子的所有照片。 我们需要看到汽车的形状与所有的细节。 如果您没有足够的照片,或者您没有拍摄特别细节的照片,则需要用铅笔绘制这些细节以了解形状。
了解汽车的尺寸也很重要:它的长度,宽度,高度和轴距。我们需要它来更好地观察和重建比例。
汽车的制作并不是一个蓝图。 很多时候他们是错误的,虽然他们可以帮助在模型的创建的第一阶段,当我们需要快速,正确地建立主要形状。如果你没有蓝图,这不是问题,因为有照片和汽车的尺寸就够了。

Step 02: Problems with references
There can be many problems with referenceimages. The most common mistakes during the work with references are asfollows:
If you have a photo with the side view ofthe car, you may wish to load it into the side projection and start to create achassis with this photo. This will ultimately end up being incorrect as it willlead to distortion of the overall shape of the model. The point is that thephoto has a perspective which will cause a strong distortion. If you don't havea blueprint with a side view, it is better to simply trust your eyes.
Another problem can be caused by using photoswithout taking the camera's characteristics into account. Usually we use up tofive photos to create the accurate shape and there is potential for mistakeswhen setting the scene's camera differently to the settings of the camera thatwas used for taking the photo. If you made the references yourself, you can seethe settings of your camera by just right-clicking on the filename and choosingProperties > Details. If you don't know the settings of your photo, you needto set the camera manually. It takes time, but it helps a lot in comparing yourphoto and model.
Regardless of our approach in the creationof conditions for modeling, the chief thing is not to make the mistakesdescribed above. Of course, it is possible to create a car without any photosor blueprints, but the outcome will depend on how well your eye is developed.If you don't trust your sense of proportions or you want to be absolutely sure,you need to use some auxiliary pictures. The chief thing is not to confusephotos with blueprints and not to use them as replacements for one-another.
二、引用问题
参考图像可能有很多问题。参考文献中最常见的错误如下:
如果您有一张照片的侧视图,您可能希望将其加载到侧面投影,并开始使用此照片创建一个机箱。这将最终不正确,因为它将导致模型的整体形状的扭曲。关键是照片有一个会导致强烈扭曲的视角。如果你没有一个侧面的蓝图,最好是相信你的眼睛。
使用照片而不考虑相机的特性可能会导致另一个问题。通常我们最多可以使用五张照片来创建准确的形状,并且当将场景的照相机与用于拍摄照片的相机的设置不同时,可能会出现错误。如果您自己做了参考,可以通过右键单击文件名并选择“属性”>“详细信息”,来查看相机的设置。如果您不了解照片的设置,则需要手动设置相机。它需要时间,但它有助于比较你的照片和模型。
不管我们在创造条件建模时的做法,首要的是不要犯错误。当然,有可能创建没有任何照片或蓝图的汽车,但结果将取决于你的眼睛的发展程度。如果您不信任您的比例感,或者您想要绝对确定,则需要使用一些辅助图片。主要的是不要将照片与蓝图混淆在一起,而不能将它们用作另一种替代品。

Step 03: Blueprints
If you load a blueprint, do it through theImage Plane and don't forget to choose Looking Through Camera in the ImagePlane Attributes.
三、蓝图
如果您加载蓝图,请通过图像平面进行操作,不要忘记在图像平面属性中选择“透视相机”。

Step 04: Blocking
As for the present model, we have only onephoto which makes our task much more interesting. The car is exclusive, sothere aren't as many photos as we'd like. But we have all that is necessary.
When working with similar cars, the chiefthing is to take the uniqueness of these cars into consideration. Multiple carmodels are frequently made on the same basis, so you can find photos orblueprints of a very similar car to work on (remember to recognize and applythe differences in detail though).
So, beginning the process of creation ofthe model, we create a simple box.
四、封锁
至于现在的模式,我们只有一张照片,使我们的任务更有趣。这辆车是独家的。
在使用类似的汽车时,主要是考虑这些车的独特性。 多个车型经常在同一基础上进行,所以您可以找到一辆非常相似的车的照片或蓝图来工作(请记住尽可能地识别和应用差异)。
所以,开始创建模型的过程,我们创建一个简单的框。

Step 05: Settings
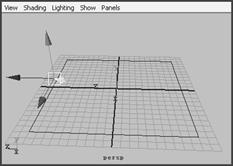
It is important to place this box in thecenter of the interface co-ordinates. Also, this box must have the overalldimensions of the car. For example, if you know the car's length, width, andheight, you should set them as the dimensions of that box.
The next step is to divide the box exactlyin half. We need to cut exactly in the center of the co-ordinates. If the boxis displaced, you need to align it along the grid by using the snapkey X. Next,delete one half and copy the existing object with the Instance Value,reflecting the geometry. Set a value of -1 in the corresponding cell of theDuplicate Special Options, to reflect the block.
五、设置
将此框放置在界面坐标的中心很重要。 此外,这个盒子必须具有汽车的整体尺寸。 例如,如果您知道汽车的长度,宽度和高度,则应将其设置为该框的尺寸。
下一步是将框分成两半。 我们需要在坐标的中心精确地切割。 如果框被移动,则需要使用快捷键X将其与栅格对齐。接下来,删除一半,并使用实例值复制现有对象,反映几何。在“重复特殊选项”的相应单元格中设置值-1,以反映该块。

Step 06: Adding polygons
We have two halves and each is part of ourfuture car. To complicate the shape, we need to add polygons. We can do thisnow, remembering that the chief thing is to divide each edge exactly in half.
We could also have initially created a boxwith the required number of edges (the number of edges may have been differentthough).
六、添加多边形
我们有两半,每个都是我们未来车的一部分。 要使形状复杂化,我们需要添加多边形。 我们现在可以这样做,记住首要的是将每个边缘分成两半。
我们也可以最初创建一个具有所需数量边的框(尽管边的数量可能有所不同)。

Step 07: Bending the geometry
Next, we begin to work with the shape.First, we will bend the geometry a little.
七、弯曲几何
接下来,我们开始使用形状。 首先,我们将弯曲几何。

Step 08: More shapes
It is very important to understand that inthis case, the shape of the chassis will consist of three parts; a basis andtwo front fenders. So initially, we will leave a straight line on the sides andwill bend the geometry only at the center. After a simple manipulation, we cancreate the shape seen here.
八、更多的形状
非常重要的是要了解,在这种情况下,底盘的形状将由三部分组成:一个基础和两个前挡泥板。 所以最初,我们将在两侧留下一条直线,只能在中心弯曲几何。经过简单的操纵,我们可以创造出这里所看到的形状。

Step 09: Refining the shape
Now we can safely leave the pentagons andtriangles behind. At this stage, our goal is to give our geometry a better car shape.We delineate the chassis and fenders. To make our work easier later, we need amore precise shape. At this moment, the topology does not matter so we canleave the unmarked areas, but the edges must be aligned. At this stage, we showthe chassis' main elements. Also, we can delete the bottom completely to makeour work easier.
九、精炼形状
现在我们可以安全地离开五边形和三角形。 在这个阶段,我们的目标是让我们的几何形状更好。 我们勾勒出底盘和挡泥板。 为了使我们的工作更容易,我们需要一个更精确的形状。此时,拓扑结构并不重要,所以我们可以离开未标记的区域,但边缘必须对齐。 在这个阶段,我们展示了底盘的主要元素。 此外,我们可以完全删除底部,使我们的工作更容易。

Step 10: Refining angles
When we make an object that looks like acar's chassis, we need to regulate the many angles according to the detailsshown in the original photo. We can always use primitives for this task.
十、精炼角度
当我们制作一个看起来像汽车底盘的物体时,我们需要根据原始照片中显示的细节调节多个角度。我们可以随时使用原语进行此任务。

Step 11: Beveling
Now we have the basic shapes down for thecreation of the car, we can begin to bevel the edges. Don't be in a hurry withthe detail.
十一、倒角
现在我们已经有了创造汽车的基本形状,我们可以开始倾斜边缘。不要急于细节。

Step 12: More refinements
Despite the fact that we just outlined thecar's chassis, now it is very important to feel the shape of the car and makecorrections to the model according to the shapes in the photo. The chief thingis to see our halved sections completed. Imagine that you have a finished carand then complete any absent parts mentally.
十二、更多细化
尽管事实上我们刚刚概述了汽车的底盘,现在感觉汽车的形状和根据照片中的形状进行修正是非常重要的。主要的是看到我们的半部分完成了。 想象你有一辆成品车,然后精神上完成任何缺勤部分。

Step 13: Smoothing
When we correct the shape, it's importantto remove the triangles and pentagons to make the shape smoother. We just needto choose any of the halves and set the Exponential Smooth Type value to 1.
You should obtain something similar tothis.
十三、平滑
当我们修正形状时,重要的是去除三角形和五边形以使形状更平滑。我们只需要选择任意一半,并将“指数平滑类型”值设置为1。你应该得到类似的东西。

Step 14: Trim the mesh
Now we have many more polygons than we beganwith. We need to trim the mesh and set the Harden Edge value to Normal. Now youshould be left with a simple exterior.
十四、修剪网格
现在我们有更多的多边形比我们开始的时候。 我们需要修剪网格并将硬化边缘值设置为“正常”。 现在你应该留下一个简单的外观。

Step 15: Corrections
In this step, we need to make manycorrections at once:
1. Make a cylinder and place it where thereshould be a wheel arch. Cut through the mesh and align all the tops of thecylinders.
2. Simplify the bonnet and make it narrowertowards the grill.
3. Set the edge at the place where thecenter of the wheel should be and watch out for the neighboring edges - they donot need to be joined together.
4. Clear the mesh from the side - this isnot obligatory, but simple geometry is always better. Also remove any unnecessarypolygons, leaving only the most necessary ones. We can always add new polygonslater if we need to.
5. Remove some polygons from the interior.Also work over the trunk, lowering the rear fender according to the photo.
At this point, it is important to form aprecise mesh. We don't need an ideal mesh; we need a basis for further work, sotry to make your mesh smoother and more logical. Also it is important to markall principal places on the chassis by one or two edges.
It is no problem if you accidentally removeany extra edges. The chief thing is not to break the formed structure and toobserve order in the mesh. If the edges are placed chaotically and withoutobservance of distance, you will likely have a problem with the shape. Youshould focus on having a well arranged mesh, even if you remove severalsections later on.
十五、更正
在这一步中,我们需要一次进行许多更正:
1.制作一个圆柱体,将其放在应该有一个轮拱的地方。切割网格并对齐圆柱体的所有顶部。
2.简化发动机罩,使其更窄。
3.将边缘设置在车轮中心位置,注意相邻边缘 - 不需要连接在一起。
4.从侧面清除网格 - 这不是强制性的,但简单的几何总是更好。还要删除任何不必要的多边形,只留下最需要的多边形。如果我们需要,我们可以随时添加新的多边形。
5.从内部拆下一些多边形。也可以在树干上工作,根据照片降下后挡泥板。
在这一点上,重要的是形成一个精确的网格。我们不需要理想的网格;我们需要进一步工作的基础,所以尝试使您的网格更平滑和更合乎逻辑。此外,重要的是将机箱上的所有主要位置标记为一个或两个边缘。
如果您不小心删除任何额外的边缘,这是没有问题的。主要的是不要打破形成的结构,并且在网格中观察秩序。如果边缘混乱放置,而不遵守距离,则可能会导致形状问题。您应该专注于布置好网格,即使稍后删除多个部分。

Step 16: Complicating geometry
Next, we add some Bevels and complicate thegeometry a bit where it is needed. We need to emphasize the chassis' principal lines.For now, you will need to make a single edge, so we can form a specific mesharound that edge later.
十六、复杂几何
接下来,我们添加一些斜面,并使几何在需要的地方复杂化。我们需要强调底盘的主要线路。 现在,你需要做一个单一的边缘,所以我们可以在这个边缘之后形成一个特定的网格。

Step 17: Check the mesh
Remember we will smooth the mesh later onto obtain the required accuracy. At this point, that mesh should contain as fewtriangles and polygons as possible.
十七、检查网格
记住我们将在以后平滑网格以获得所需的准确性。 在这一点上,该网格应该包含尽可能少的三角形和多边形。

Step 18: The base model
Now we have a basic model for future work.At this stage, we have full freedom to edit any dubious areas and correct theproportions. Don't forget to check with reference photos and look at the modelfrom different sides.
Make sure you rotate your model often; lookat the model from different sides and try to imagine the finished car. Also,try not to get lost in contemplation of your reference photos. Switch betweenphotos faster and try to catch the whole shape: it can make further workeasier. Finally, don't be in a hurry with details. First, you need to create abasic shape and then move from the general to the particular.
十八、基本模型
现在我们有一个未来工作的基本模式。 在这个阶段,我们有充分的自由来编辑任何可疑的领域并纠正比例。 不要忘记查看参考照片,并从不同方面看模型。
确保经常旋转你的模型; 看看不同方面的模特,试着想象成品车。 另外,尽量不要迷失在考虑你的参考照片。 切换照片更快,并尝试抓住整个形状:它可以使更多的工作更容易。 最后,不要急于细节。首先,您需要创建一个基本的形状,然后从一般到特定的形状。

相关推荐:
版权声明
本文仅代表作者观点,不代表本站立场。
本文系作者授权发表,未经许可,不得转载。
本文地址:/3Dsheji/165522.html


