图片增加或更换天空比较容易,大致分为三步走。首先要把天空部分选取出来;然后用合适的天空素材替换;后期调色,处理细节即可。
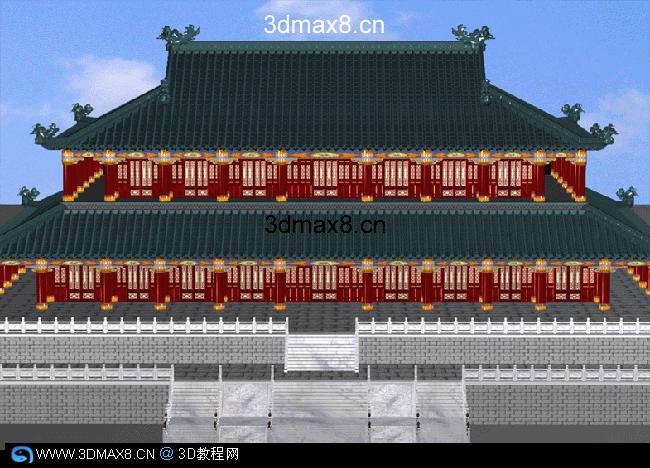
原图

最终效果

1、菜单栏“选择”——“色彩范围”,然后以天空作为采样,白色范围为天空的采样范围(颜色容差尽量开大点,确保整片天空都能采样)。然后点击确定。

2、点击确定后,Ctrl+J复制一层天空的图层,用橡皮擦把地面多出来的采样部分擦除。因为我们要用的是天空的采样。

3、从网上找来自己喜欢的天空素材,直接拉到PS里。我平时有存素材的习惯。


4、刚刚把天空拉进来的时候,是这样的。

5、按住Ctrl同时鼠标左键单击“天空采样”图层,选择天空的范围。

6、然后把“天空采样”左边的眼睛点掉(也就是隐藏图层)。单击拉进来的天空图层,然后添加图层模板。注意选择“正片叠底”并把不透明度变成80%。

7、记得,这个时候要对着天空图层点击右键,选择“栅格化图层”。

8、这个时候,基本的造型出来了。

9、我们会发现,蓝天有点别扭。于是我们要做的是让天与地的白平衡和格调一致。
强烈注意:这里记得单击“可选颜色1”图层然后按Ctrl+Alt+G创建剪切模板(你会发现“选取颜色”前面有一个拐向下的箭头)。意思就是只对天空素材作出变动。


10、按Ctrl+Alt+Shitf+E盖印图层。

11、基本上,到这里为止,偷天换日搞定了。盖印图层(图层2)就是我们说的基础图。在此基础上,要后期成哪种风格就每个人自己喜欢了。调色过程就不再赘述,每个人喜好不一样,我比较偏向于唯美梦幻的风光调调。要逼格高一点,可以在调色之后用【灯光工厂】这个插件加个太阳进去。

最终效果:
原图
最终效果
1、菜单栏“选择”——“色彩范围”,然后以天空作为采样,白色范围为天空的采样范围(颜色容差尽量开大点,确保整片天空都能采样)。然后点击确定。
2、点击确定后,Ctrl+J复制一层天空的图层,用橡皮擦把地面多出来的采样部分擦除。因为我们要用的是天空的采样。
3、从网上找来自己喜欢的天空素材,直接拉到PS里。我平时有存素材的习惯。
4、刚刚把天空拉进来的时候,是这样的。
5、按住Ctrl同时鼠标左键单击“天空采样”图层,选择天空的范围。
6、然后把“天空采样”左边的眼睛点掉(也就是隐藏图层)。单击拉进来的天空图层,然后添加图层模板。注意选择“正片叠底”并把不透明度变成80%。
7、记得,这个时候要对着天空图层点击右键,选择“栅格化图层”。
8、这个时候,基本的造型出来了。
9、我们会发现,蓝天有点别扭。于是我们要做的是让天与地的白平衡和格调一致。
强烈注意:这里记得单击“可选颜色1”图层然后按Ctrl+Alt+G创建剪切模板(你会发现“选取颜色”前面有一个拐向下的箭头)。意思就是只对天空素材作出变动。
10、按Ctrl+Alt+Shitf+E盖印图层。
11、基本上,到这里为止,偷天换日搞定了。盖印图层(图层2)就是我们说的基础图。在此基础上,要后期成哪种风格就每个人自己喜欢了。调色过程就不再赘述,每个人喜好不一样,我比较偏向于唯美梦幻的风光调调。要逼格高一点,可以在调色之后用【灯光工厂】这个插件加个太阳进去。
最终效果:
版权声明
本文仅代表作者观点,不代表本站立场。
本文系作者授权发表,未经许可,不得转载。
本文地址:/PMsheji/zhaopianchuli/157162.html