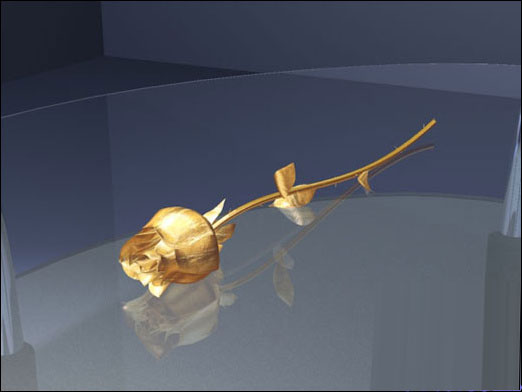
最终效果

1、首先创建一个新图片,图片的尺寸大小可以自行决定,如图所示。

2、背景图层填充黑色,选择画笔工具,按下F5打开画笔预设,分别设置形状动态、散布、其它动态3个选项,并勾选平滑,如图所示。


3、使用设置好的画笔工具在图片中绘画出一遍星空,如图所示。

4、执行“图像—调整—色阶”调整输入色阶的三个调整点,如图所示。

5、确定后再次打开色阶对话框进行设置,如图所示,减小天空中的星星。


6、创建一个新图层命名为“云”,执行“滤镜—渲染—云彩”,然后设置云图层的混合模式为滤色,不透明度为30%,使用橡皮擦工具(设置如下图所示),清除部分云彩,使云彩集中在中间,如图所示。


7、使用横排文字工具在图片中输入文字,在教程中我使用了名为Bickham Script Pro的字体,如图所示。

8、使用钢笔工具沿着文字的轨迹创建路径,然后隐藏文字图层,如图所示。


9、在图层面板中创建一个文件夹并命名为“文字样式”,然后在文件夹里创建一个新图层命名为“文字路径”,选择画笔工具,设置画笔大小为3px,然后选择钢笔工具在图片中单击右键,选择描边路径,勾选择模拟压力,效果如图所示。

10、双击“文字路径”图层打开图层样式对话框,分别设置混合选项和外发光,如图所示。


11、按下Ctrl+J复制“文字路径”图层,接着执行“滤镜—模糊—动感模糊”,设置角度为0,距离为30。 再按下3次Ctrl+J复制3次,选择“文字路径副本2”设置动感模糊,角度为30,距离为30。
选择“文字路径副本3”设置动感模糊,角度为45,距离为30。
选择“文字路径副本4”设置动感模糊,角度为60,距离为30。

12、选择“文字路径”图层再按下4次Ctrl+J复制4次,选择“文字路径副本5”设置动感模糊,角度为0,距离为60。 选择“文字路径副本6”设置动感模糊,角度为30,距离为60。
选择“文字路径副本7”设置动感模糊,角度为45,距离为60。
选择“文字路径副本8”设置动感模糊,角度为60,距离为60。

13、在文件夹的外面创建一个新图层填充白色,执行“滤镜—杂色—添加杂色”,设置数量为400%,高斯分布,单色。然后执行“滤镜—模糊—径向模糊”,设置数量为100,缩放、最佳,效果如图所示。

14、设置这个图层的混合模式为叠加,如图所示。

15、在图层面板的顶部创建一个渐变映射调整图层(图层—新建调整图层—渐变映射),设置蓝色(#12045c)到橙色(#ff5400)的渐变,混合模式为叠加,效果如图所示。

16、复制“文字样式”组,然后隐藏“文字样式”组里的“文字路径”图层,如图所示。

17、 在“文本样式副本”组里创建一个新图层,使用较大的白色柔角画笔在图片的中心单击,然后减小图层不透明度为50%,如图所示。

18、设置画笔的尺寸小一点,然后继续在刚才的位置单击,加强发光效果,如图所示。

19、复制“文本样式副本”组,然后按着Ctrl键单击 “文本样式副本”和“文本样式副本2”这两个组,接着单击右键选择合并图层,最后执行“滤镜—模糊—径向模糊,设置数量为100,缩放,最好,如图所示。

20、选择画笔工具,按下F5打开画笔面板,设置如下图所示。


21、创建一个新图层,使用设置好的画笔在图片中添加一些白色的点。

22、执行“滤镜—模糊—径向模糊”,设置数量为20,旋转、最好,最终效果如图所示。
1、首先创建一个新图片,图片的尺寸大小可以自行决定,如图所示。
2、背景图层填充黑色,选择画笔工具,按下F5打开画笔预设,分别设置形状动态、散布、其它动态3个选项,并勾选平滑,如图所示。
3、使用设置好的画笔工具在图片中绘画出一遍星空,如图所示。
4、执行“图像—调整—色阶”调整输入色阶的三个调整点,如图所示。
5、确定后再次打开色阶对话框进行设置,如图所示,减小天空中的星星。
6、创建一个新图层命名为“云”,执行“滤镜—渲染—云彩”,然后设置云图层的混合模式为滤色,不透明度为30%,使用橡皮擦工具(设置如下图所示),清除部分云彩,使云彩集中在中间,如图所示。
7、使用横排文字工具在图片中输入文字,在教程中我使用了名为Bickham Script Pro的字体,如图所示。
8、使用钢笔工具沿着文字的轨迹创建路径,然后隐藏文字图层,如图所示。
9、在图层面板中创建一个文件夹并命名为“文字样式”,然后在文件夹里创建一个新图层命名为“文字路径”,选择画笔工具,设置画笔大小为3px,然后选择钢笔工具在图片中单击右键,选择描边路径,勾选择模拟压力,效果如图所示。
10、双击“文字路径”图层打开图层样式对话框,分别设置混合选项和外发光,如图所示。
11、按下Ctrl+J复制“文字路径”图层,接着执行“滤镜—模糊—动感模糊”,设置角度为0,距离为30。 再按下3次Ctrl+J复制3次,选择“文字路径副本2”设置动感模糊,角度为30,距离为30。
选择“文字路径副本3”设置动感模糊,角度为45,距离为30。
选择“文字路径副本4”设置动感模糊,角度为60,距离为30。
12、选择“文字路径”图层再按下4次Ctrl+J复制4次,选择“文字路径副本5”设置动感模糊,角度为0,距离为60。 选择“文字路径副本6”设置动感模糊,角度为30,距离为60。
选择“文字路径副本7”设置动感模糊,角度为45,距离为60。
选择“文字路径副本8”设置动感模糊,角度为60,距离为60。
13、在文件夹的外面创建一个新图层填充白色,执行“滤镜—杂色—添加杂色”,设置数量为400%,高斯分布,单色。然后执行“滤镜—模糊—径向模糊”,设置数量为100,缩放、最佳,效果如图所示。
14、设置这个图层的混合模式为叠加,如图所示。
15、在图层面板的顶部创建一个渐变映射调整图层(图层—新建调整图层—渐变映射),设置蓝色(#12045c)到橙色(#ff5400)的渐变,混合模式为叠加,效果如图所示。
16、复制“文字样式”组,然后隐藏“文字样式”组里的“文字路径”图层,如图所示。
17、 在“文本样式副本”组里创建一个新图层,使用较大的白色柔角画笔在图片的中心单击,然后减小图层不透明度为50%,如图所示。
18、设置画笔的尺寸小一点,然后继续在刚才的位置单击,加强发光效果,如图所示。
19、复制“文本样式副本”组,然后按着Ctrl键单击 “文本样式副本”和“文本样式副本2”这两个组,接着单击右键选择合并图层,最后执行“滤镜—模糊—径向模糊,设置数量为100,缩放,最好,如图所示。
20、选择画笔工具,按下F5打开画笔面板,设置如下图所示。
21、创建一个新图层,使用设置好的画笔在图片中添加一些白色的点。
22、执行“滤镜—模糊—径向模糊”,设置数量为20,旋转、最好,最终效果如图所示。
版权声明
本文仅代表作者观点,不代表本站立场。
本文系作者授权发表,未经许可,不得转载。
本文地址:/PMsheji/wenzitexiao/158364.html