Photoshop 制作一个漂亮的水晶3D图标
最终效果

1、新建一个600 * 600像素的文件,背景填充黑色,新建一个图层,命名为“上表面”,用钢笔工具勾出下图所示的路径,转为选区。

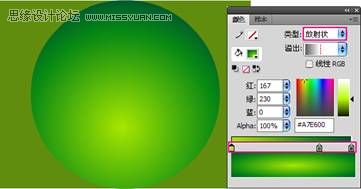
<图1> 2、选择渐变工具,颜色设置如图2,拉出图3所示的线性渐变。

<图2>

<图3>
3、新建一个图层,用钢笔勾出图4所示的选区,拉出图5所示的线性渐变色,效果如图6。

<图4>

<图5>

<图6> 4、同样的方法制作出另一反光部分,如下图。

<图7>
5、把“上表面”图层复制一层,用钢笔勾出下图所示的选区,按Ctrl + Alt + D 羽化5个像素,按Ctrl + Shift + I 反选,按Delete 删除。取消选区后锁定图层,填充颜色:#D4E036,图层混合模式改为“颜色减淡”,效果如图9。

<图8>

<图9> 6、新建一个图层,用钢笔勾出图10所示的选区,填充白色作为高光,效果如图11。

<图10>

<图11>
7、调出“上表面”图层选区,执行:选择 > 修改 > 收缩,数值为15,确定按Ctrl + Alt + D 羽化15个像素,然后在图层的最上面新建一个图层填充颜色:#CDA326,图层混合模式改为“颜色减淡”,图层不透明度改为:60%,效果如图13。

<图12>

<图13> 8、在背景图层上面新建一个图层,用钢笔勾出图14所示的选区,拉上图15所示的线性渐变,效果如图16。

<图14>

<图15>

<图16> 9、同样的方法再制作其它面,效果如图17,18。

<图17>

<图18> 10、同样的方法再制作其它的反光面效果,过程如图19-22。

<图19>

<图20>

<图21>

<图22>
11、最后整体调整好细节和光感,完成最终效果。

<图23>

1、新建一个600 * 600像素的文件,背景填充黑色,新建一个图层,命名为“上表面”,用钢笔工具勾出下图所示的路径,转为选区。

<图1> 2、选择渐变工具,颜色设置如图2,拉出图3所示的线性渐变。

<图2>

<图3>
3、新建一个图层,用钢笔勾出图4所示的选区,拉出图5所示的线性渐变色,效果如图6。

<图4>

<图5>

<图6> 4、同样的方法制作出另一反光部分,如下图。

<图7>
5、把“上表面”图层复制一层,用钢笔勾出下图所示的选区,按Ctrl + Alt + D 羽化5个像素,按Ctrl + Shift + I 反选,按Delete 删除。取消选区后锁定图层,填充颜色:#D4E036,图层混合模式改为“颜色减淡”,效果如图9。

<图8>

<图9> 6、新建一个图层,用钢笔勾出图10所示的选区,填充白色作为高光,效果如图11。

<图10>

<图11>
7、调出“上表面”图层选区,执行:选择 > 修改 > 收缩,数值为15,确定按Ctrl + Alt + D 羽化15个像素,然后在图层的最上面新建一个图层填充颜色:#CDA326,图层混合模式改为“颜色减淡”,图层不透明度改为:60%,效果如图13。

<图12>

<图13> 8、在背景图层上面新建一个图层,用钢笔勾出图14所示的选区,拉上图15所示的线性渐变,效果如图16。

<图14>

<图15>

<图16> 9、同样的方法再制作其它面,效果如图17,18。

<图17>

<图18> 10、同样的方法再制作其它的反光面效果,过程如图19-22。

<图19>

<图20>

<图21>

<图22>
11、最后整体调整好细节和光感,完成最终效果。

<图23>
版权声明
本文仅代表作者观点,不代表本站立场。
本文系作者授权发表,未经许可,不得转载。
本文地址:/PMsheji/PS/147215.html


