Photoshop 制作一把金色钥匙步骤
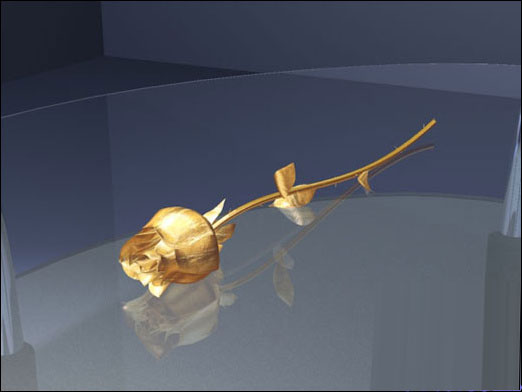
最终效果

1、新建一个600 * 600像素的文件,选择渐变工具,颜色设置如图1,拉出图2所示的径向渐变色。

<图1>

<图2> 2、新建一个图层,用钢笔勾出图3所示的选区,选择渐变工具,颜色设置如图4,拉出图5所示的线性渐变色。

<图3>

<图4>

<图5> 3、在背景图层上面新建一个图层,用椭圆选框工具拉出下图所示的正圆选区填充黑色。

<图6>
4、用钢笔勾出下图所示的选区,按“Delete”删除。

<图7>
5、锁定图层后,选择渐变工具,颜色设置如图8,拉出图9所示的径向渐变。

<图8>

<图9> 6、选择减淡工具把箭头所示的位置涂亮一点,如下图。

<图10>
7、用钢笔勾出下图所示的选区,按Ctrl + Alt + D 羽化1个像素后填充颜色:#F5FAD2,效果如图12。

<图11>

<图12> 8、在图层的最上面新建一个图层,用钢笔勾出图13所示的选区,选择渐变工具,颜色设置如图14,拉出图15所示的线性渐变。

<图13>

<图14>

<图15> 9、新建一个图层,用钢笔勾出图16所示的选区,填充颜色:#C77A28,用加深工具把边缘部分涂深一点,效果如下图。

<图16>

<图17>
10、新建一个图层,用钢笔勾出图18所示的选区,拉上渐变色,左边边缘部分用加深工具稍微加深一点,见效果如图19。

<图18>

<图19> 11、新建一个图层,用钢笔勾出下图所示的选区,用稍微亮一点的颜色涂上高光。

<图20>
12、新建一个图层,用钢笔勾出下图所示的选区,填充淡黄色,用减淡工具把边缘及中间涂点高光。

<图21>
13、整体调整下细节,加上一点投影,完成最终效果。

<图22>

1、新建一个600 * 600像素的文件,选择渐变工具,颜色设置如图1,拉出图2所示的径向渐变色。

<图1>

<图2> 2、新建一个图层,用钢笔勾出图3所示的选区,选择渐变工具,颜色设置如图4,拉出图5所示的线性渐变色。

<图3>

<图4>

<图5> 3、在背景图层上面新建一个图层,用椭圆选框工具拉出下图所示的正圆选区填充黑色。

<图6>
4、用钢笔勾出下图所示的选区,按“Delete”删除。

<图7>
5、锁定图层后,选择渐变工具,颜色设置如图8,拉出图9所示的径向渐变。

<图8>

<图9> 6、选择减淡工具把箭头所示的位置涂亮一点,如下图。

<图10>
7、用钢笔勾出下图所示的选区,按Ctrl + Alt + D 羽化1个像素后填充颜色:#F5FAD2,效果如图12。

<图11>

<图12> 8、在图层的最上面新建一个图层,用钢笔勾出图13所示的选区,选择渐变工具,颜色设置如图14,拉出图15所示的线性渐变。

<图13>

<图14>

<图15> 9、新建一个图层,用钢笔勾出图16所示的选区,填充颜色:#C77A28,用加深工具把边缘部分涂深一点,效果如下图。

<图16>

<图17>
10、新建一个图层,用钢笔勾出图18所示的选区,拉上渐变色,左边边缘部分用加深工具稍微加深一点,见效果如图19。

<图18>

<图19> 11、新建一个图层,用钢笔勾出下图所示的选区,用稍微亮一点的颜色涂上高光。

<图20>
12、新建一个图层,用钢笔勾出下图所示的选区,填充淡黄色,用减淡工具把边缘及中间涂点高光。

<图21>
13、整体调整下细节,加上一点投影,完成最终效果。

<图22>
版权声明
本文仅代表作者观点,不代表本站立场。
本文系作者授权发表,未经许可,不得转载。
本文地址:/PMsheji/PS/147115.html


