


Photoshop 柔美的光带壁纸制作方法
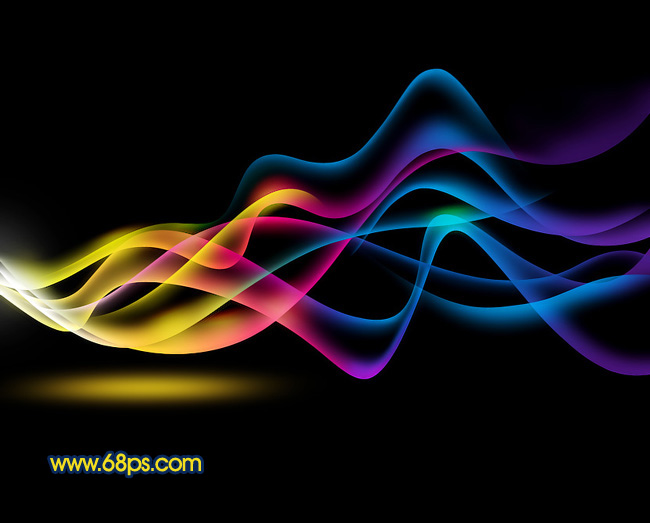
最终效果

1、新建一个壁纸大小的文档,如1024 * 768像素。选择渐变工具,颜色设置如图1,拉出图2所示的径向渐变。

<图1>

<图2> 2、新建一个图层,用钢笔工具勾出下图所示的选区。

<图3>
3、选择画笔工具,画笔不透明度设置为:10%,选择适当大小的笔刷在选区边缘涂抹。涂抹的时候先用较大的笔刷加上淡淡的底色,然后用稍小的笔刷把边缘部分加亮一点,如图4,5。

<图4>

<图5> 4、新建一个图层,用钢笔勾出下图所示的选区填充白色。按Ctrl + D 取消选区。

<图6>
5、执行:滤镜 > 模糊 > 动感模糊,参数设置如图7,效果如图8。

<图7>

<图8> 6、新建一个图层,用钢笔勾出下图所示的选区,再用画笔涂上淡淡白色,如下图。

<图9>
7、新建一个图层,同样的方法用钢笔勾出选区,再用画笔涂抹上色。制作出各种形状的光带,效果如图10,11,12。

<图10>

<图11>

<图12> 8、把背景图层影藏,在图层的最上面新建一个图层,按Ctrl + Alt + Shift + E 盖印图层,图层不透明度设置为50%,再把背景图层显示出来,效果如下图。

<图13>
9、新建一个图层,把前景颜色设置为淡黄色,用画笔点上一些小点,效果如下图。

<图14>
10、最后适当调整一下颜色,打上装饰文字,完成最终效果。
<图15>
1、新建一个壁纸大小的文档,如1024 * 768像素。选择渐变工具,颜色设置如图1,拉出图2所示的径向渐变。
<图1>
<图2> 2、新建一个图层,用钢笔工具勾出下图所示的选区。
<图3>
3、选择画笔工具,画笔不透明度设置为:10%,选择适当大小的笔刷在选区边缘涂抹。涂抹的时候先用较大的笔刷加上淡淡的底色,然后用稍小的笔刷把边缘部分加亮一点,如图4,5。
<图4>
<图5> 4、新建一个图层,用钢笔勾出下图所示的选区填充白色。按Ctrl + D 取消选区。
<图6>
5、执行:滤镜 > 模糊 > 动感模糊,参数设置如图7,效果如图8。
<图7>
<图8> 6、新建一个图层,用钢笔勾出下图所示的选区,再用画笔涂上淡淡白色,如下图。
<图9>
7、新建一个图层,同样的方法用钢笔勾出选区,再用画笔涂抹上色。制作出各种形状的光带,效果如图10,11,12。
<图10>
<图11>
<图12> 8、把背景图层影藏,在图层的最上面新建一个图层,按Ctrl + Alt + Shift + E 盖印图层,图层不透明度设置为50%,再把背景图层显示出来,效果如下图。
<图13>
9、新建一个图层,把前景颜色设置为淡黄色,用画笔点上一些小点,效果如下图。
<图14>
10、最后适当调整一下颜色,打上装饰文字,完成最终效果。
<图15>
版权声明
本文仅代表作者观点,不代表本站立场。
本文系作者授权发表,未经许可,不得转载。
本文地址:/PMsheji/PS/147109.html


![[下载]Win10 Build 10159全新默认壁纸"英雄"出炉:4K高清](https://img.jbzj.com/file_images/article/201507/201507020832522.jpg)
