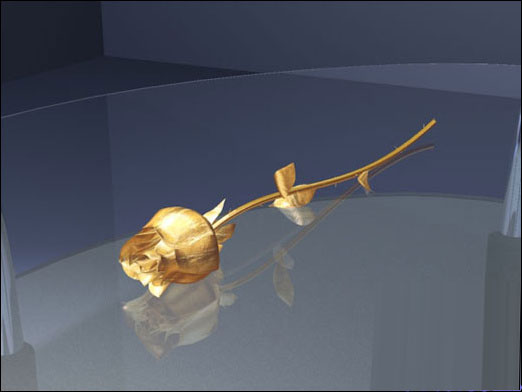
Photoshop设计制作出一支精致的金色画笔
最终效果

1、先来看一下画笔的拆分图,大致由下面几部分构成:笔头、笔杆、金属圈。

<图1>
2、新建一个1024 * 768像素的文件,背景选区白色。先来制作笔杆部分。选择椭圆工具,前景色任意,然后拉出下图所示的椭圆。

<图2>
3、选择菜单:图层 > 图层样式 > 渐变叠加,参数及渐变色设置如下图。

<图3>

<图4>
4、选择矩形选框工具框选下图所示的矩形选区,然后给当前图层添加蒙版,效果如下图。

<图5>
5、新建一个组,在组里新建一个图层,用钢笔勾出金属圈的轮廓,转为选区如下图。

<图6>
6、选择渐变工具,颜色设置如图7,由上至下拉出图8所示的线性渐变。

<图7>

<图8>
7、新建一个图层,用钢笔勾出图9所示的选区,拉上图10所示的线性渐变。

<图9>

<图10>
8、在当前组的最下面新建一个图层,用钢笔勾出下图所示的选区,拉上同上的渐变色。

<图11>
9、在背景图层上面新建一个组,在组里新建一个图层,用钢笔勾出笔头的轮廓,转为选区后填充红褐色:#CF7201,如下图。

<图12>
10、新建一个图层,按Ctrl + Alt + G 创建剪贴蒙版。然后在当前图层下面新建一个图层,用钢笔勾出底部暗部选区,羽化10个像素后填充稍暗的红褐色:#8A2801。

<图13>
11、新建一个图层,用钢笔勾出顶部暗部选区,羽化10个像素后填充同上的暗褐色。

<图14>
12、新建一个图层,用钢笔勾出下图所示的选区,羽化1个像素后填充橙黄色:#E19733。

<图15>
13、新建一个图层,用钢笔勾出下图所示的选区,羽化1个像素后填充橙黄色。

<图16>
14、新建一个图层,同上的方法制作其它高光及暗部,过程如图17 - 20。

<图17>

<图18>

<图19>

<图20>
15、新建一个图层,混合模式改为“颜色减淡”,把前景颜色设置为橙黄色:#DC8804,用画笔把下图选区部分涂上前景色,效果如下图。

<图21>
16、新建一个图层,用钢笔勾出顶部暗部选区,羽化10个像素后填充暗褐色:#852B01,如下图。

<图22>
17、创建亮度/对比度调整图层,适当增加图片的对比度,参数及效果如下图。

<图23>

<图24>
18、新建一个图层,按Ctrl + Alt + Shift + E 盖印图层。按Ctrl + Shift + U 去色,执行:滤镜 > 其它 > 高反差保留,数值默认,确定后把图层混合模式改为“柔光”,不透明度改为:20%,效果如下图。

<图25>
最后微调一下细节,完成最终效果。


1、先来看一下画笔的拆分图,大致由下面几部分构成:笔头、笔杆、金属圈。

<图1>
2、新建一个1024 * 768像素的文件,背景选区白色。先来制作笔杆部分。选择椭圆工具,前景色任意,然后拉出下图所示的椭圆。

<图2>
3、选择菜单:图层 > 图层样式 > 渐变叠加,参数及渐变色设置如下图。

<图3>

<图4>
4、选择矩形选框工具框选下图所示的矩形选区,然后给当前图层添加蒙版,效果如下图。

<图5>
5、新建一个组,在组里新建一个图层,用钢笔勾出金属圈的轮廓,转为选区如下图。

<图6>
6、选择渐变工具,颜色设置如图7,由上至下拉出图8所示的线性渐变。

<图7>

<图8>
7、新建一个图层,用钢笔勾出图9所示的选区,拉上图10所示的线性渐变。

<图9>

<图10>
8、在当前组的最下面新建一个图层,用钢笔勾出下图所示的选区,拉上同上的渐变色。

<图11>
9、在背景图层上面新建一个组,在组里新建一个图层,用钢笔勾出笔头的轮廓,转为选区后填充红褐色:#CF7201,如下图。

<图12>
10、新建一个图层,按Ctrl + Alt + G 创建剪贴蒙版。然后在当前图层下面新建一个图层,用钢笔勾出底部暗部选区,羽化10个像素后填充稍暗的红褐色:#8A2801。

<图13>
11、新建一个图层,用钢笔勾出顶部暗部选区,羽化10个像素后填充同上的暗褐色。

<图14>
12、新建一个图层,用钢笔勾出下图所示的选区,羽化1个像素后填充橙黄色:#E19733。

<图15>
13、新建一个图层,用钢笔勾出下图所示的选区,羽化1个像素后填充橙黄色。

<图16>
14、新建一个图层,同上的方法制作其它高光及暗部,过程如图17 - 20。

<图17>

<图18>

<图19>

<图20>
15、新建一个图层,混合模式改为“颜色减淡”,把前景颜色设置为橙黄色:#DC8804,用画笔把下图选区部分涂上前景色,效果如下图。

<图21>
16、新建一个图层,用钢笔勾出顶部暗部选区,羽化10个像素后填充暗褐色:#852B01,如下图。

<图22>
17、创建亮度/对比度调整图层,适当增加图片的对比度,参数及效果如下图。

<图23>

<图24>
18、新建一个图层,按Ctrl + Alt + Shift + E 盖印图层。按Ctrl + Shift + U 去色,执行:滤镜 > 其它 > 高反差保留,数值默认,确定后把图层混合模式改为“柔光”,不透明度改为:20%,效果如下图。

<图25>
最后微调一下细节,完成最终效果。

版权声明
本文仅代表作者观点,不代表本站立场。
本文系作者授权发表,未经许可,不得转载。
本文地址:/PMsheji/PS/146655.html


