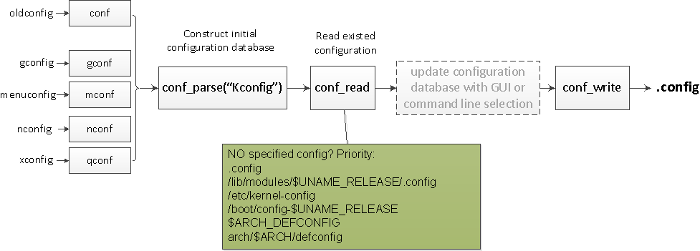
移植新内核到Linux系统上的操作步骤
1、在ubuntu官网下载ubuntu16.04的镜像和对应ubuntu16.04的内核版本源代码,或者在镜像源上找
2、安装ubuntu16.04到PC主机上
接下来执行以下:
编译新的Linux内核给X86内核使用出现以下错误:
scripts/sign-file.c:25:30: fatal error: openssl/opensslv.h: No such file or directory
解决方法:
(1)下载openssl-1.0.1d.tar.gz
- tar xzf openssl-1.0.1d.tar.gz
- cd openssl-1.0.1d/
- ./config shared no-asm --prefix=$PWD/tmp
- 然后打开Makefile
- 搜索install_docs,将这个编译选项去掉。
- make && make install
- cp ./tmp/include/* /usr/include
- cp ./tmp/lib/* /usr/lib
(2)apt-get upgrade && apt-get update
个人推荐第二种。
再到内核源码根目录
- cp /boot/config-xxxxxx-generic
- make -jx (x代表数字2,4,8,表示CPU核心数)
- make modules_install
- make install
- 确认成功后,reboot
内核移植成功。
总结
以上就是这篇文章的全部内容了,希望本文的内容对大家的学习或者工作具有一定的参考学习价值,谢谢大家对潘少俊衡的支持。如果你想了解更多相关内容请查看下面相关链接
版权声明
本文仅代表作者观点,不代表本站立场。
本文系作者授权发表,未经许可,不得转载。
本文地址:/jtjc/Linux/113742.html


