Nginx下升级https的方法步骤
购买证书
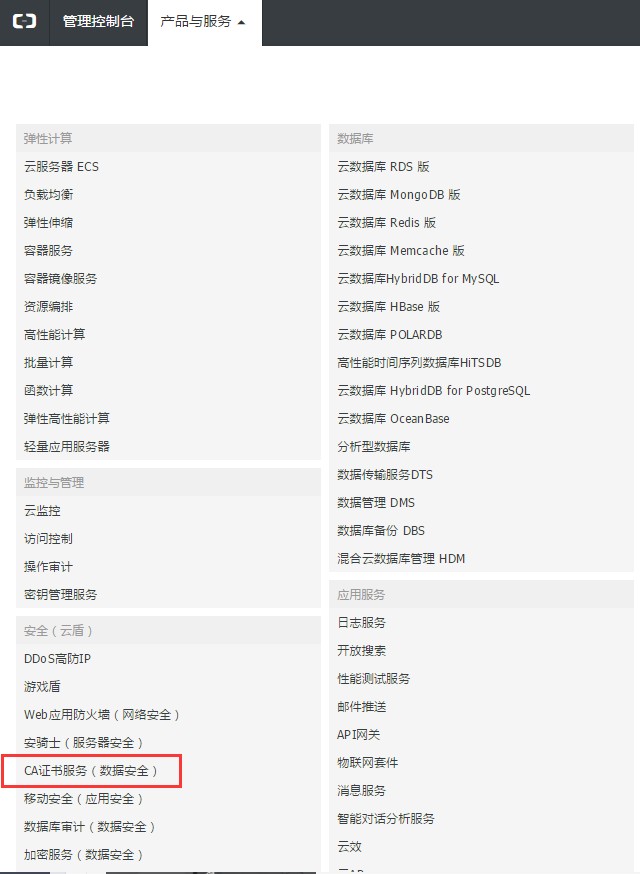
可以去阿里云的云盾证书服务购买
下载证书
在证书控制台下载 Nginx 版本证书。下载到本地的压缩文件包解压后包含:
- .pem 文件:证书文件
- .key 文件:证书的私钥文件(申请证书时如果没有选择 自动创建CSR ,则没有该文件)
配置Nginx
1、在 Nginx 的安装目录下创建 cert 目录,并且将下载的全部文件拷贝到 cert 目录中,如果申请证书时是自己创建的CSR文件,请将对应的私钥文件放到 cert 目录下。
2、打开 Nginx 安装目录下 conf 目录中的 nginx.conf 文件
#user nobody;
worker_processes 1;

#error_log logs/error.log;
#error_log logs/error.log notice;
#error_log logs/error.log info;

#pid    logs/nginx.pid;

events {
  worker_connections 1024;
}

http {
  include    mime.types;
  default_type application/octet-stream;

  #log_format main '$remote_addr - $remote_user [$time_local] "$request" '
  #         '$status $body_bytes_sent "$http_referer" '
  #         '"$http_user_agent" "$http_x_forwarded_for"';

  #access_log logs/access.log main;

  sendfile    on;
  #tcp_nopush   on;

  #keepalive_timeout 0;
  keepalive_timeout 65;

  gzip on;  #开启gzip
  gzip_min_length 1k; #低于1kb的资源不压缩
  gzip_comp_level 3; #压缩级别【1-9】,越大压缩率越高,同时消耗cpu资源也越多,建议设置在4左右。
  gzip_types text/plain application/javascript application/x-javascript text/javascript text/xml text/css; #需要压缩哪些响应类型的资源,多个空格隔开。不建议压缩图片,下面会讲为什么。
  gzip_disable "MSIE [1-6]\."; #配置禁用gzip条件,支持正则。此处表示ie6及以下不启用gzip(因为ie低版本不支持)
  gzip_vary on; #是否添加“Vary: Accept-Encoding”响应头

  server {
    listen    80 default backlog=2048; #配置http可用
    listen    443 ssl; #配置https
    server_name localhost;

    ssl_certificate   ../cert/hzzly.pem; #配置证书文件
    ssl_certificate_key ../cert/hzzly.key; #配置私钥文件

    ssl_session_cache  shared:SSL:1m;
    ssl_session_timeout 5m;

    ssl_ciphers HIGH:!aNULL:!MD5;
    ssl_prefer_server_ciphers on;

    location / {
      root  /home/hzzly;
      index index.html index.htm;
    }

    # location ^~ /apis/ {
    #   proxy_set_header Host $host;
    #   proxy_set_header X-Real-IP $remote_addr;
    #   proxy_set_header X-Forwarded-Server $host;
    #   # 匹配任何以 /apis/ 开始的请求,并停止匹配 其它location
    #   proxy_pass http://xxxxxxxxxx/;
    # }

    # location ^~ /assets/ {
    #   gzip_static on;
    #   expires max;
    #   add_header Cache-Control public;
    # }
  }
}
3、重启 Nginx
$ cd /usr/local/nginx/sbin
$ ./nginx -s reload
错误详解
1、Nginx如果未开启SSL模块,配置Https时提示错误
nginx: [emerg] the "ssl" parameter requires ngx_http_ssl_module in ...
Nginx开启SSL模块
切换到源码包:
$ cd /usr/local/src/nginx-1.16.0
修改新的configure参数
$ ./configure --prefix=/usr/local/nginx --with-http_stub_status_module --with-http_ssl_module
配置完成后,运行命令
$ make //这里不要进行make install,否则就是覆盖安装
备份原有已安装好的nginx
$ cp /usr/local/nginx/sbin/nginx /usr/local/nginx/sbin/nginx.bak
将刚刚编译好的nginx覆盖掉原有的nginx
$ cp ./objs/nginx /usr/local/nginx/sbin/
重启 Nginx
$ cd /usr/local/nginx/sbin
$ ./nginx -s reload
以上就是本文的全部内容,希望对大家的学习有所帮助,也希望大家多多支持潘少俊衡。
版权声明
本文仅代表作者观点,不代表本站立场。
本文系作者授权发表,未经许可,不得转载。
本文地址:/jtjc/Linux/111640.html


