原图

最终效果

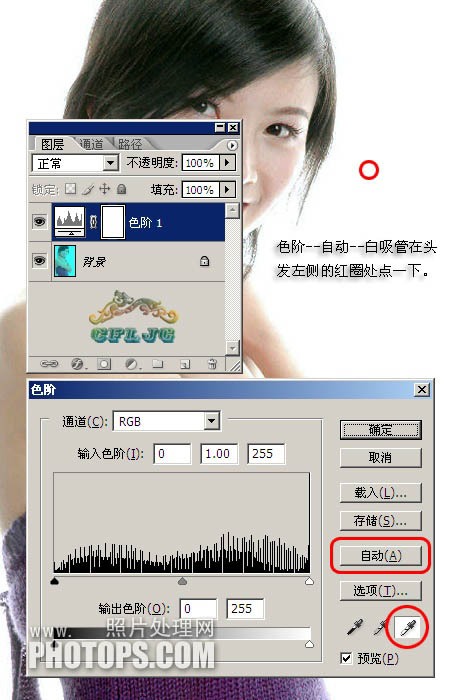
打开素材图片,创建色阶调整图层,点击右侧的“自动”选项,再用用“设置白场”的吸管在头发左侧的红圈处点一下即可。
偏暗的图片修复:


打开图片,创建曲线调整图层,选择“自动”,然后用“设置白场”吸管吸取裙子高光颜色即可。

最终效果
打开素材图片,创建色阶调整图层,点击右侧的“自动”选项,再用用“设置白场”的吸管在头发左侧的红圈处点一下即可。
偏暗的图片修复:
打开图片,创建曲线调整图层,选择“自动”,然后用“设置白场”吸管吸取裙子高光颜色即可。
版权声明
本文仅代表作者观点,不代表本站立场。
本文系作者授权发表,未经许可,不得转载。
本文地址:/PMsheji/zhaopianchuli/159559.html