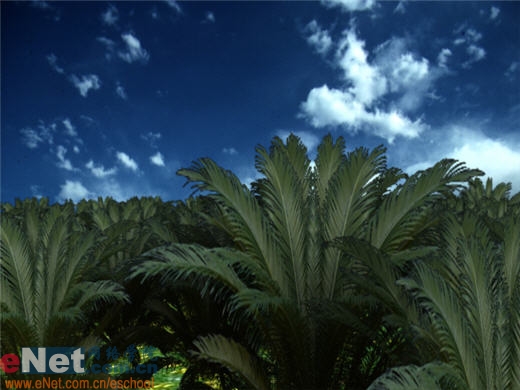
我们需要的主色是青色,调色的时候可以把素材中的绿色都转为青色,暗部则转为青蓝色,然后把整体颜色调淡一点,局部柔化处理即可。
原图

最终效果

1、打开素材图片,创建可选颜色调整图层,对黄,绿色进行调整,参数及效果如下图。这一步把背景部分的绿色转为青绿色。

<图1>

<图2>

<图3>
2、按Ctrl + J 把当前可选颜色调整图层复制一层,不透明度改为:60%,效果如下图。

<图4>
3、创建色相/饱和度调整图层,对全图及红色进行调整,参数设置如图5,6,效果如图7。这一步降低全图及红色饱和度。

<图5>

<图6>

<图7>
4、新建一个图层,按字母键“D”,把前背景颜色恢复到默认的黑白,然后选择菜单:滤镜 > 渲染 > 云彩,确定后按Ctrl + B 调整一下颜色,增加青蓝色,如下图。

<图8>
5、把云彩图层的混合模式改为“滤色”,不透明度改为:30%,效果如下图。

<图9>
6、创建曲线调整图层,对RGB、绿、蓝通道进行调整,参数设置如图10 - 12,效果如图13。这一步主要给图片高光及暗部增加蓝色。

<图10>

<图11>

<图12>

<图13>
7、创建可选颜色调整图层,对青、白、黑进行调整,参数设置如图14 - 16,效果如图17。这一步主要把图片中的青色调淡。

<图14>

<图15>

<图16>

<图17>
8、按Ctrl + J 把当前可选颜色调整图层复制一层,效果如下图。

<图18>
9、按Ctrl + Alt + 2 调出高光选区,按Ctrl + Shift + I 反选,新建一个图层填充暗青色:#7B8D96,混合模式改为“滤色”,不透明度改为:20%,效果如下图。这一步把图片暗部颜色调淡一点。

<图19>
10、创建色彩平衡调整图层,对阴影,高光进行调整,参数及效果如下图。这一步微调暗部及高光颜色。

<图20>

<图21>

<图22>
11、新建一个图层,按Ctrl + Alt + Shift + E 盖印图层,用模糊工具把背景部分不太柔和的部分模糊处理。

<图23>
12、创建可选颜色调整图层,对绿、青、白、黑进行调整,参数设置如图24 - 27,效果如图28。这一步给图片增加淡青色。

<图24>

<图25>

<图26>

<图27>

<图28>
13、新建一个图层,填充暗青色:#7A8C95,混合模式改为“滤色”,添加图层蒙版,用黑白渐变由左上角至右下角拉出白色至黑色线性渐变,效果如下图。这一步给图片增加高光,如果觉得不够明显,可以把图层多复制几层。

<图29>
14、新建一个图层,盖印图层,可根据需要把图片柔化处理,效果如下图。

<图30>
15、把背景图层复制一层,按Ctrl + Shift + ] 置顶,按住Alt键添加图层蒙版,用白色画笔把人物脸部及肤色部分擦出来,效果如下图。

<图31>
16、微调一下人物肤色部分,根据环境融合即可。

<图32>
17、新建一个图层,给图片局部增加一点高光,效果如下图。

<图33>
最后微调一下颜色,完成最终效果。

原图

最终效果

1、打开素材图片,创建可选颜色调整图层,对黄,绿色进行调整,参数及效果如下图。这一步把背景部分的绿色转为青绿色。

<图1>

<图2>

<图3>
2、按Ctrl + J 把当前可选颜色调整图层复制一层,不透明度改为:60%,效果如下图。

<图4>
3、创建色相/饱和度调整图层,对全图及红色进行调整,参数设置如图5,6,效果如图7。这一步降低全图及红色饱和度。

<图5>

<图6>

<图7>
4、新建一个图层,按字母键“D”,把前背景颜色恢复到默认的黑白,然后选择菜单:滤镜 > 渲染 > 云彩,确定后按Ctrl + B 调整一下颜色,增加青蓝色,如下图。

<图8>
5、把云彩图层的混合模式改为“滤色”,不透明度改为:30%,效果如下图。

<图9>
6、创建曲线调整图层,对RGB、绿、蓝通道进行调整,参数设置如图10 - 12,效果如图13。这一步主要给图片高光及暗部增加蓝色。

<图10>

<图11>

<图12>

<图13>
7、创建可选颜色调整图层,对青、白、黑进行调整,参数设置如图14 - 16,效果如图17。这一步主要把图片中的青色调淡。

<图14>

<图15>

<图16>

<图17>
8、按Ctrl + J 把当前可选颜色调整图层复制一层,效果如下图。

<图18>
9、按Ctrl + Alt + 2 调出高光选区,按Ctrl + Shift + I 反选,新建一个图层填充暗青色:#7B8D96,混合模式改为“滤色”,不透明度改为:20%,效果如下图。这一步把图片暗部颜色调淡一点。

<图19>
10、创建色彩平衡调整图层,对阴影,高光进行调整,参数及效果如下图。这一步微调暗部及高光颜色。

<图20>

<图21>

<图22>
11、新建一个图层,按Ctrl + Alt + Shift + E 盖印图层,用模糊工具把背景部分不太柔和的部分模糊处理。

<图23>
12、创建可选颜色调整图层,对绿、青、白、黑进行调整,参数设置如图24 - 27,效果如图28。这一步给图片增加淡青色。

<图24>

<图25>

<图26>

<图27>

<图28>
13、新建一个图层,填充暗青色:#7A8C95,混合模式改为“滤色”,添加图层蒙版,用黑白渐变由左上角至右下角拉出白色至黑色线性渐变,效果如下图。这一步给图片增加高光,如果觉得不够明显,可以把图层多复制几层。

<图29>
14、新建一个图层,盖印图层,可根据需要把图片柔化处理,效果如下图。

<图30>
15、把背景图层复制一层,按Ctrl + Shift + ] 置顶,按住Alt键添加图层蒙版,用白色画笔把人物脸部及肤色部分擦出来,效果如下图。

<图31>
16、微调一下人物肤色部分,根据环境融合即可。

<图32>
17、新建一个图层,给图片局部增加一点高光,效果如下图。

<图33>
最后微调一下颜色,完成最终效果。

版权声明
本文仅代表作者观点,不代表本站立场。
本文系作者授权发表,未经许可,不得转载。
本文地址:/PMsheji/zhaopianchuli/159062.html


