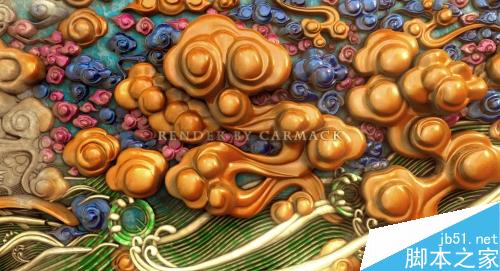
最终效果


2.把文字删格化图层,然后选择菜单 : 滤镜 > 纹理 > 染色玻璃 参数设置如图2(注:前景颜色要为黑色),效果如图3


3.选择魔术棒工具,点文字的黑线位置得到图4所示的选区,然后按 Ctrl + Shift + I 反选,点通道棉板,新建一个通道填充白色

4.选择菜单 滤镜 > 模糊 > 高斯模糊 数值为4,效果如图5

5.按 Ctrl + L 调出色阶控制棉板,参数设置如图6 效果如图7


6.调出选区,回到图层面板,新建一个图层,填充白色,把之前的文字图层隐藏。然后调出图层样式参数设置如图8,图9 完成最终效果


2.把文字删格化图层,然后选择菜单 : 滤镜 > 纹理 > 染色玻璃 参数设置如图2(注:前景颜色要为黑色),效果如图3
3.选择魔术棒工具,点文字的黑线位置得到图4所示的选区,然后按 Ctrl + Shift + I 反选,点通道棉板,新建一个通道填充白色
4.选择菜单 滤镜 > 模糊 > 高斯模糊 数值为4,效果如图5
5.按 Ctrl + L 调出色阶控制棉板,参数设置如图6 效果如图7
6.调出选区,回到图层面板,新建一个图层,填充白色,把之前的文字图层隐藏。然后调出图层样式参数设置如图8,图9 完成最终效果
版权声明
本文仅代表作者观点,不代表本站立场。
本文系作者授权发表,未经许可,不得转载。
本文地址:/PMsheji/wenzitexiao/157941.html