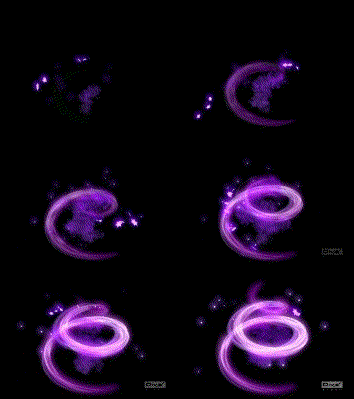
最终效果图

素材

1、选择“文件/新建”菜单,打开“新建”或者Ctrl+N对话框名称为:PS打造彩色文字,宽度:为800像素,高度:为600像素,“分辨率”为72,“模式”为RGB颜色的文档,如图1所示。

2、执行菜单:“文件”/“导入”,导入素材,调整其到适合的位置及大小,选择素材图层1,如图2所示。

3、在工具箱中选择横排文字工具,在画面中用鼠标单击后,出现一个输入文字光标,在光标后输入“sqncd”,在工具选项栏中设置字体为“RadiumJ”,设置字体大小为“160点”,设置消除锯齿为“平滑”,设置字体颜色为白色,如图3所示。

4、双单击sqncd图层进入到图层样式,分别勾选投影、内阴影、外发光、内发光、斜面和浮雕、渐变叠加、图案叠加、光泽选项。如图4所示

5、勾选投影,设置混合模式为:正片叠加,颜色为:黑色,不透明度为:50%,角度为:90度,距离为:10像素,扩展为:40%,大小为:10像素,如图5所示。

6、勾选内阴影,设置内阴影混合模式:柔光,点击色标处,阴影颜色设置为黑色,不透明度:40%,角度:-41,距离:20像素,阻塞为:100%,大小:0像素,然后点击确定按钮,如图6所示。

7、勾选外发光选项,设置投影混合模式:正常,不透明度:40%,点击点按可编辑渐变,设置前景到透明,颜色为黑色到白色,方法为柔和,扩展为0%,大小为:5像素,范围为50%,如图7所示。

8、勾选内发光选项,设置投影混合模式:颜色减淡,不透明度:65%,杂色:0%,点击点按可编辑渐变,设置前景到透明,颜色为黑色到透明,方法为:精确,源:居中,阻塞:0%,大小为:65像素,范围为:50%,其它设置参考图8,如图8所示。

9、勾选斜面和浮雕复选项,样式:内斜面,方法:雕刻清晰,深度:155%,方向:下,大小:250像素,软化:0像素,角度:20,高度:20度,高光模式为:叠加,颜色为:白色,不透明度为:80%,阴影模式为:柔光,颜色为:黑色,不透明度为:100%,其他设置值参考图9,如图9所示。

10、勾选光泽复选项,混合模式:柔光,点击色标处,设置光泽颜色:白色,设置不透明度:40%,角度:19度,距离:15像素,大小:25像素,勾选消除锯齿和反相,如图10所示。

11、勾选渐变叠加选项,混合模式:线性加深,设置不透明度:100%,点击渐变色标处,弹出渐变编辑器,双击如图12中的A处,设置色彩RGB分别为 204、168、116。再双击图12中所示的B处,设置RGB分别为149、53、143,再双击图12中所示的C处,设置RGB分别为90、16、 121,如图12所示


12、勾选图案叠加选项,设置混合模式为正常,不透明度为100%,其他设置值参考图13,如图13所示。

13、在图层样板中,选择SQNCD图层,复制一个SQNCD图层副本,并双单击sqncd副本图层进入到图层样式,分别勾选颜色叠加、图案叠加、描边选项。如图14所示

14、勾选颜色叠加选项,混合模式:正常,点击色标处,设置光泽颜色:紫色,设置不透明度:100%,如图15所示。

15、勾选图案叠加选项,设置混合模式为正常,不透明度为100%,其他设置值参考图16,如图16所示。

16、勾选描边选项,设置大小为3像素,位置为居中,混合模式为正常,不透明度为100%,其他设置值参考图17,如图17所示。调整后的效果如图如图18所示


素材

1、选择“文件/新建”菜单,打开“新建”或者Ctrl+N对话框名称为:PS打造彩色文字,宽度:为800像素,高度:为600像素,“分辨率”为72,“模式”为RGB颜色的文档,如图1所示。

2、执行菜单:“文件”/“导入”,导入素材,调整其到适合的位置及大小,选择素材图层1,如图2所示。

3、在工具箱中选择横排文字工具,在画面中用鼠标单击后,出现一个输入文字光标,在光标后输入“sqncd”,在工具选项栏中设置字体为“RadiumJ”,设置字体大小为“160点”,设置消除锯齿为“平滑”,设置字体颜色为白色,如图3所示。

4、双单击sqncd图层进入到图层样式,分别勾选投影、内阴影、外发光、内发光、斜面和浮雕、渐变叠加、图案叠加、光泽选项。如图4所示

5、勾选投影,设置混合模式为:正片叠加,颜色为:黑色,不透明度为:50%,角度为:90度,距离为:10像素,扩展为:40%,大小为:10像素,如图5所示。

6、勾选内阴影,设置内阴影混合模式:柔光,点击色标处,阴影颜色设置为黑色,不透明度:40%,角度:-41,距离:20像素,阻塞为:100%,大小:0像素,然后点击确定按钮,如图6所示。

7、勾选外发光选项,设置投影混合模式:正常,不透明度:40%,点击点按可编辑渐变,设置前景到透明,颜色为黑色到白色,方法为柔和,扩展为0%,大小为:5像素,范围为50%,如图7所示。

8、勾选内发光选项,设置投影混合模式:颜色减淡,不透明度:65%,杂色:0%,点击点按可编辑渐变,设置前景到透明,颜色为黑色到透明,方法为:精确,源:居中,阻塞:0%,大小为:65像素,范围为:50%,其它设置参考图8,如图8所示。

9、勾选斜面和浮雕复选项,样式:内斜面,方法:雕刻清晰,深度:155%,方向:下,大小:250像素,软化:0像素,角度:20,高度:20度,高光模式为:叠加,颜色为:白色,不透明度为:80%,阴影模式为:柔光,颜色为:黑色,不透明度为:100%,其他设置值参考图9,如图9所示。

10、勾选光泽复选项,混合模式:柔光,点击色标处,设置光泽颜色:白色,设置不透明度:40%,角度:19度,距离:15像素,大小:25像素,勾选消除锯齿和反相,如图10所示。

11、勾选渐变叠加选项,混合模式:线性加深,设置不透明度:100%,点击渐变色标处,弹出渐变编辑器,双击如图12中的A处,设置色彩RGB分别为 204、168、116。再双击图12中所示的B处,设置RGB分别为149、53、143,再双击图12中所示的C处,设置RGB分别为90、16、 121,如图12所示


12、勾选图案叠加选项,设置混合模式为正常,不透明度为100%,其他设置值参考图13,如图13所示。

13、在图层样板中,选择SQNCD图层,复制一个SQNCD图层副本,并双单击sqncd副本图层进入到图层样式,分别勾选颜色叠加、图案叠加、描边选项。如图14所示

14、勾选颜色叠加选项,混合模式:正常,点击色标处,设置光泽颜色:紫色,设置不透明度:100%,如图15所示。

15、勾选图案叠加选项,设置混合模式为正常,不透明度为100%,其他设置值参考图16,如图16所示。

16、勾选描边选项,设置大小为3像素,位置为居中,混合模式为正常,不透明度为100%,其他设置值参考图17,如图17所示。调整后的效果如图如图18所示


版权声明
本文仅代表作者观点,不代表本站立场。
本文系作者授权发表,未经许可,不得转载。
本文地址:/PMsheji/wenzitexiao/157865.html


