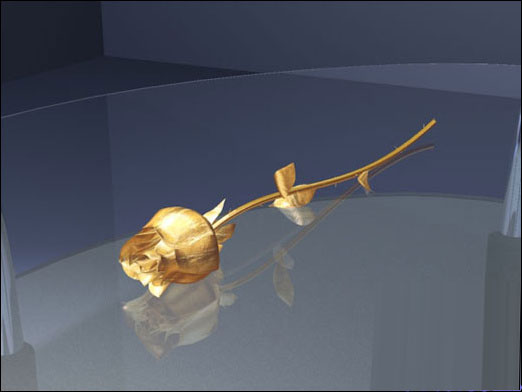
最终效果

1、制作文字之前先点这里下载文字分层图。文字和立体面都有提供。制作的时候也需要分段来完成,首先需要完成的效果如下图。

<图1>
2、选择顶部的文字图层,锁定图层像素,选择渐变工具,颜色设置如图2,由上至下拉出图3所示的线性渐变作为文字颜色。

<图2>

<图3>
3、双击文字图层缩略图调出图层样式,设置斜面与浮雕,等高线,参数设置如图4,5,效果如图6。

<图4>

<图5>

<图6>
4、按Ctrl + J 把文字图层复制一层,然后双击文字副本缩略图调出图层样式,稍微修改一下斜面与浮雕的参数,等高线的不用变,参数如图7,确定后把图层填充度改为:0%,效果如图8。

<图7>

<图8>
5、顶部文字已经完成,再来制作立体面的效果。文字菱角比较多,需要处理的面也比较多,先不要急。我们制作的顺序是从左边的文字开始逐个制作。
先用钢笔工具勾出一个面的选区,选择渐变工具,颜色设置如图9,按照一定角度拉出渐变,确定后按Ctrl + Alt + G 创建剪贴蒙版,效果如图9。

<图9>

<图10>
6、其它面板的制作方法相同,自己耐心制作,大致效果如下图。

<图11>
7、把顶部的文字组及背景图层隐藏。在立体面组上面新建一个图层,按Ctrl + Alt + Shift + E 盖印图层。然后把当前图层调成金色调。再把其他图层显示出来,效果如下图。

<图12>
8、给当前图层添加图层样式,选择斜面与浮雕,参数设置如下图。

<图13>
9、按住Alt键给当前图层添加图层蒙版,用钢笔勾出图14所示的选区,给蒙版填充白色。效果如图15。

<图14>

<图15>
10、再简单给文字添加投影。方法调出文字选区,适当羽化后填充黑色,再适当移动位置及修改图层不透明度,感觉自然即可。

<图16>
11、底部的几个面的制作方法完全相同,如图17 - 19。

<图17>

<图18>

<图19>
12、最底部的立体面制作方法同上,效果如下图。

<图20>
13、整体增加一点投影,效果如下图。

<图21>
最后修饰一些细节,完成最终效果。


1、制作文字之前先点这里下载文字分层图。文字和立体面都有提供。制作的时候也需要分段来完成,首先需要完成的效果如下图。

<图1>
2、选择顶部的文字图层,锁定图层像素,选择渐变工具,颜色设置如图2,由上至下拉出图3所示的线性渐变作为文字颜色。

<图2>

<图3>
3、双击文字图层缩略图调出图层样式,设置斜面与浮雕,等高线,参数设置如图4,5,效果如图6。

<图4>

<图5>

<图6>
4、按Ctrl + J 把文字图层复制一层,然后双击文字副本缩略图调出图层样式,稍微修改一下斜面与浮雕的参数,等高线的不用变,参数如图7,确定后把图层填充度改为:0%,效果如图8。

<图7>

<图8>
5、顶部文字已经完成,再来制作立体面的效果。文字菱角比较多,需要处理的面也比较多,先不要急。我们制作的顺序是从左边的文字开始逐个制作。
先用钢笔工具勾出一个面的选区,选择渐变工具,颜色设置如图9,按照一定角度拉出渐变,确定后按Ctrl + Alt + G 创建剪贴蒙版,效果如图9。

<图9>

<图10>
6、其它面板的制作方法相同,自己耐心制作,大致效果如下图。

<图11>
7、把顶部的文字组及背景图层隐藏。在立体面组上面新建一个图层,按Ctrl + Alt + Shift + E 盖印图层。然后把当前图层调成金色调。再把其他图层显示出来,效果如下图。

<图12>
8、给当前图层添加图层样式,选择斜面与浮雕,参数设置如下图。

<图13>
9、按住Alt键给当前图层添加图层蒙版,用钢笔勾出图14所示的选区,给蒙版填充白色。效果如图15。

<图14>

<图15>
10、再简单给文字添加投影。方法调出文字选区,适当羽化后填充黑色,再适当移动位置及修改图层不透明度,感觉自然即可。

<图16>
11、底部的几个面的制作方法完全相同,如图17 - 19。

<图17>

<图18>

<图19>
12、最底部的立体面制作方法同上,效果如下图。

<图20>
13、整体增加一点投影,效果如下图。

<图21>
最后修饰一些细节,完成最终效果。

版权声明
本文仅代表作者观点,不代表本站立场。
本文系作者授权发表,未经许可,不得转载。
本文地址:/PMsheji/wenzitexiao/157773.html


