最终的效果图吧: :
:
具体的制作步骤如下:
步骤一
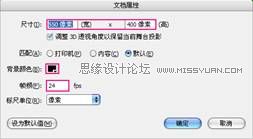
创建新文件,大小1400px * 800px,然后设置淡蓝色背景

创建新图层,使用白色柔和的笔刷工具在画布中心点上白点。

新图层的混合模式设置为"柔光"

效果如下

步骤2
通过这一步,加入3d文字效果,首先使用文字工具,淡粉色,输入一行字。
 PS CS6下,字体图层, 3D>从所选图层新建3d凸出,具体设置如下。
 变形
变形

盖子

坐标

材质

无线光

渲染3d字体,并且转换为智能对象,得到效果如下。

利用自由变换 将字体旋转一定角度。

新建下面两个调整图层,作为文字图层的剪贴蒙版
水平

曲线

效果如下:

步骤3
需要给图像中增加一些水果,用PS打开Fruit Stock图像,选择一组水果。
 将选中的部分复制粘贴近文字文件中,并重新调整大小。

重复上述步骤,可以多混入一点水果:

将所有的水果图层合并,然后复制几次。
在最顶层的图层中,采用滤镜>扭曲>海洋波纹,如下设置:
 效果如下
效果如下

将海洋波纹图层复制几次,按下图中那样将他们环绕与文字周围。

步骤4:
几乎要完工了!可以为水果图层加入一点液化滤镜效果

 通过笔刷,添加了云彩和水中气泡的效果。

最终结果
祝你尝试成功!
:具体的制作步骤如下:
步骤一
创建新文件,大小1400px * 800px,然后设置淡蓝色背景
创建新图层,使用白色柔和的笔刷工具在画布中心点上白点。
新图层的混合模式设置为"柔光"
效果如下
步骤2
通过这一步,加入3d文字效果,首先使用文字工具,淡粉色,输入一行字。
PS CS6下,字体图层, 3D>从所选图层新建3d凸出,具体设置如下。变形盖子
坐标
材质
无线光
渲染3d字体,并且转换为智能对象,得到效果如下。
利用自由变换 将字体旋转一定角度。
新建下面两个调整图层,作为文字图层的剪贴蒙版
水平
曲线
效果如下:
步骤3
需要给图像中增加一些水果,用PS打开Fruit Stock图像,选择一组水果。
将选中的部分复制粘贴近文字文件中,并重新调整大小。重复上述步骤,可以多混入一点水果:
将所有的水果图层合并,然后复制几次。
在最顶层的图层中,采用滤镜>扭曲>海洋波纹,如下设置:
效果如下将海洋波纹图层复制几次,按下图中那样将他们环绕与文字周围。
步骤4:
几乎要完工了!可以为水果图层加入一点液化滤镜效果
通过笔刷,添加了云彩和水中气泡的效果。最终结果
祝你尝试成功!
版权声明
本文仅代表作者观点,不代表本站立场。
本文系作者授权发表,未经许可,不得转载。
本文地址:/PMsheji/wenzitexiao/157339.html